
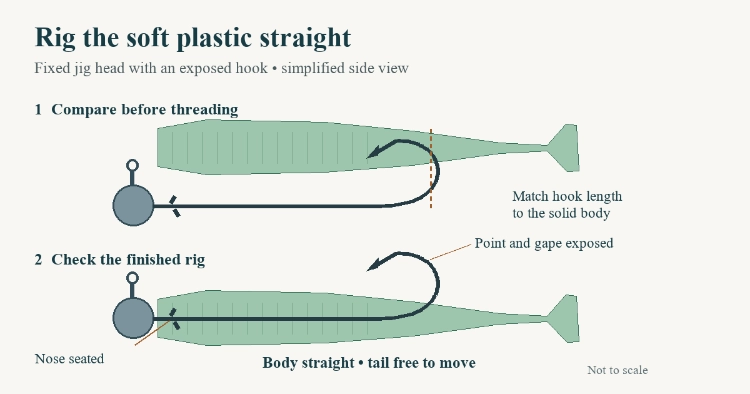
To rig a jig head, hold the hook beside your soft plastic and locate the exit point. Insert the point into the center of the nose, thread the body along the hook, then bring the point out through the back. Seat the nose against the head and check that the body stays straight.
A lure can look acceptable from one side while hiding a sideways bend. Before casting, inspect it from above and watch it move through the water. This guide covers a fixed jig head with an exposed hook, using a paddle tail, straight-tail bait or grub. Weedless offset hooks and screw-lock designs need their own rigging instructions.
Match the jig head to the soft plastic
Start with the body you want to fish. The hook must fit that body without stretching it, crushing its nose or stiffening the part intended to move.
Lay the unrigged hook beside the bait. Check the shank, the straight section behind the head, against the bait’s solid body. A hook that reaches far into a narrow tail can restrict its movement. A very short hook may leave its point close to the thickest part of the plastic. Neither head weight nor the printed hook size alone tells you whether the pair fits.
Look at the gape, the space between the shank and the point. With the bait seated, an open-hook rig needs a clearly exposed point and space around it. If the plastic crowds that opening, try a different hook shape or a slimmer body.
Select head weight separately for the presentation and conditions. Keep the complete lure within your rod’s casting rating. For a wider explanation of head styles and their uses, see Laike‘s guide to types of fishing jigs.
How to rig a jig head in six steps
Keep your fingers away from the point’s exit path. Work with an undamaged soft plastic and check the hook for obvious bending or a damaged point before you begin.
1. Identify the bait’s intended top and bottom
Find the back, belly and tail orientation before piercing the plastic. Molded fins, a belly slot or the manufacturer’s illustration can help. Follow the instructions for that particular bait; the darker color isn’t always the top.
2. Locate the hook’s exit point
Hold the jig head beside the bait with the nose in its intended final position against the head. Let the body rest at its natural length. Note where the hook bend brings the point up toward the back, then mark that spot lightly with a fingertip.
3. Enter through the center of the nose
Push the hook point into the center of the bait’s nose. Advance it along the body’s centerline, guiding the plastic around the hook bend in small movements.
Watch the nose as you work. If the point enters near one edge, the bait may sit crooked even when the exit looks centered. Back it out early and correct the entry rather than forcing the rest of the body into alignment. Take particular care with a thin nose that can split around a large keeper.
4. Bring the point out through the back
Guide the point out at the location you marked, keeping it on the centerline. Then look down from above. The hook should emerge through the middle of the back, not through one shoulder.
5. Seat the nose on the keeper
Slide the nose into its final position against the jig head. A keeper is the collar, barb or wire feature intended to hold the plastic in place. Ease the body over it without pushing excess material into a bunch behind the head.
Release your grip. The lure should retain its molded shape. A bowed back, stretched belly or compressed nose means the body isn’t resting naturally on the hook. Remeasure the exit point if necessary. If the nose splits each time you seat it, try a more suitable keeper-and-body combination.
6. Check alignment in the water
Inspect the rig from the side and above, then make a short, controlled retrieve where you can see it. Keep the hook clear of your hands and anyone nearby.
A paddle tail should have room to work while the body follows its intended path. Watch for persistent rolling, sideways tracking or a tail caught on the hook. Some baits have a designed body roll, so compare what you see with the maker’s intended action. Change one thing at a time, starting with the rigging, before changing the retrieve or head.
Adjust the method for different soft plastics
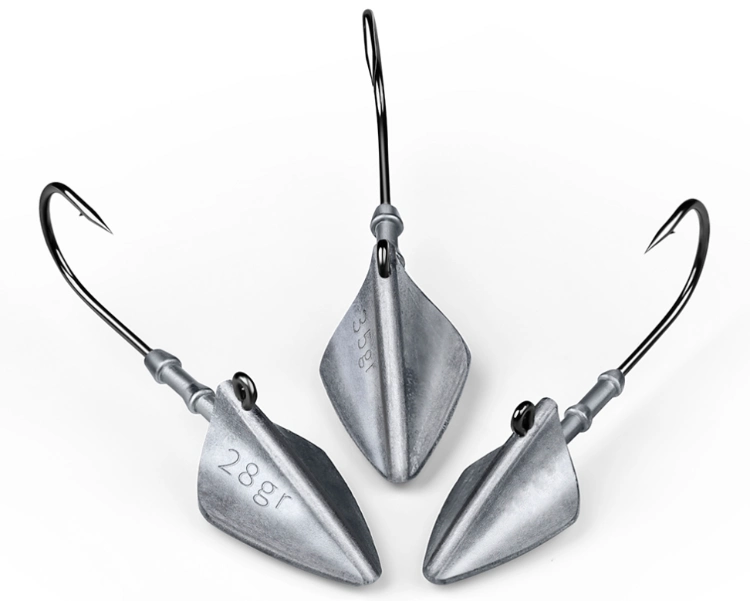
Paddle tails: Preserve the narrow tail section and the paddle’s clearance. Check that the hook doesn’t extend so far back that it stiffens the tail root. If the lure looks straight but rolls excessively, inspect its orientation and hook exit before assuming the head weight is wrong.
Curly-tail grubs: Leave the curled tail free of the point and bend. Louisiana Fishing Blog recommends a tail-down orientation opposite the upward-facing hook for the grubs in its guide. Treat that as a starting point and follow any instructions supplied with your particular lure. Check again after a cast because the tail may catch on the hook.
Straight-tail baits and shrimp shapes: Keep the intended belly underneath and avoid bending the main body around the shank. A straight tail won’t produce a paddle tail’s kick; judge whether it holds the intended profile and responds to your retrieve.
For any shape, replace a body that no longer stays aligned because its nose or hook hole is torn. Repeatedly moving the exit hole can leave too little sound material to support the rig.
Troubleshoot a jig head that won’t swim correctly
Check the body on land before changing tackle. These observations suggest places to inspect; they don’t prove a single cause.
| What you see | What to check | What to try |
| Body bows behind the head | Excess plastic compressed on the shank | Remeasure and rethread at the natural body length |
| Lure pulls to one side | Nose entry and hook exit off-center | Align both points through the body’s centerline |
| Plastic slides back repeatedly | Torn nose or poor keeper fit | Replace the body or try a compatible keeper |
| Tail barely moves | Hook reaches into the flexible tail section | Try a shorter shank that still leaves the point exposed |
| Body rolls more than intended | Twisted body or incorrect orientation | Correct the rigging, then repeat the visible swim check |
Check the line connection too. The line should run freely from the jig eye without wrapping around the hook. For the separate task of attaching the head to your line, use Laike’s jig-head knot guide.
Check the pairing before building a tackle assortment
For retailers assembling soft-plastic packs, test the actual hook-and-body pairing before ordering an assortment. Keep a sample of each proposed combination and record the body shape, hook dimensions, head weight and keeper style. A photograph from the side and above makes the intended rig easier to reproduce.
Include a simple rigging illustration on the product page or pack insert. Show the nose entry and hook exit clearly. A customer should be able to tell which body fits which head without guessing from separate size labels.
Laike’s website includes fishing hooks and soft lures. To discuss a suitable pairing, contact Laike with your intended bait shape and application, and ask which samples are available for evaluation.
Frequently asked questions
Do you need a sinker with a jig head?
Usually, a separate sinker isn’t needed for this basic rig because the head already supplies weight. Choose an appropriate head for the presentation. If you need a different sink rate or depth, reassess the head and complete setup before adding weight to the line.
Do you put bait on a jig head?
Many jig heads are dressed with a soft plastic, such as a grub or paddle tail. Some designs can also be used with natural bait. Match the bait to the hook and intended method; the threading steps here apply specifically to soft-plastic bodies.
How do you put a soft bait on a jig head?
Measure the exit point with the hook beside the body, enter through the nose center, and thread the plastic until the point emerges through the back. Seat the nose against the head. Finish by checking the body from above and watching a short retrieve.